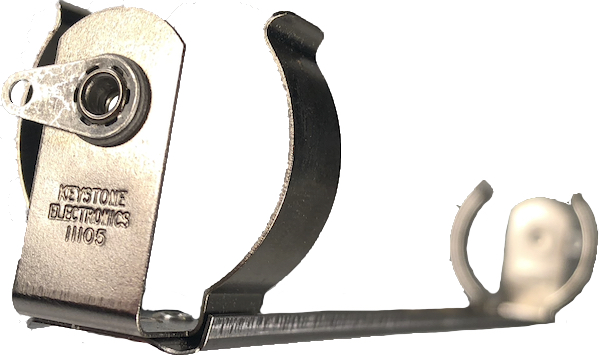
We provide two options for battery holders for the three “D-cell” batteries that run the OWHL. The first option, a nickel-plated steel holder (Table 6 Item 23) is more expensive but does not require any modifications to fit inside the PVC pipe. The second option, a polypropylene plastic holder (Table 6 Item 29), is too wide to fit in the PVC pipe with the batteries installed and needs to be modified by removing the corner edges of the holder as shown below. Both holders would typically need a JST connector pigtail soldered on to connect to the Power circuit board, although the current design of the Power circuit board now provides two through-hole terminals labeled +BAT and GND that could be used to solder wires for the user’s own chosen connector style.
4.1 Attaching the JST Connector to the Metal Battery Holder
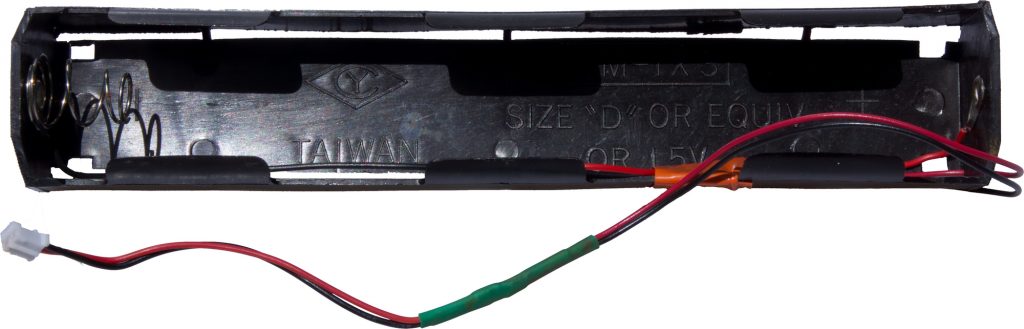
While the plastic holder comes with 26 ga wire leads, the metal battery holder does not. Short lengths of wire need to be soldered onto the ends of the metal battery holder as leads, which then are connected to the JST pigtail wire connector. The metal holder is approximately 18.5 cm (7.25 in.) in length. The additional wire with attached JST pigtail needs to be long enough to reach the JST connector on the Power circuit board. We found that an extra few centimeters of length helps to minimize pulling on the connector.
Tools Needed:
- Soldering iron & soldering materials
- Wire strippers
- Third-hand clips / Vise (or equivalent)
Materials needed:
- Metal Battery Holder (Table 6 Item 23)
- JST wire connector (Table 6 Item 28)
- Additional wire (red, black) (Table 6 Item 30)
- Heat-Shrink tubing (Table 6 Item 31)
4.2 Attaching the Wire Leads
Each end of the metal battery holder has a small metal tabbed loop connector. A short section of stripped wire can be inserted into the hole and then twisted tightly to around the loop. This can then be soldered for strength.
- Cut a length of red and black wire
- Additional length can be added to one wire lead to accommodate the length of theholder
- Strip approximately 1 cm (0.5 in) from both ends of each wire
- Insert the stripped end of one wire into the loop connector at one end of the holder
- Bend the wire around the loop and then twist tightly to secure it
- Repeat with the other wire at the other end of the holder
- Flux and solder the twisted end of the wire to the loop connector
4.3 Attaching the JST Pigtail Connector
We will now solder on the JST pigtail (Table 6 Item 28) to the ends of the wire from the battery holder. We recommend protecting the soldered connection with shrink wrap tubing. This should be installed before the connection is soldered
- Slide an appropriate sized shrink wrap tubing over the end of each wire lead coming from the battery holder.
- Make sure that it is well away from the solder joint so as not to heat it accidentally
- Flux each end of lead wire to be soldered
- Flux each end of the JST pigtail connector wire
- Use a third-hand clamp, vise or equivalent to hold the wire connection to be soldered
- Solder the connection
- Slide shrink-wrap tubing back over the connection
- Heat the shrink-wrap tubing to shrink it tightly and protect the solder connection
4.4 Modifying the Plastic Battery Holder to Fit Into the Housing
If cost is a concern, a polypropylene plastic holder (Table 6 Item 29) can be purchased for nearly half the cost of the metal holder. However, it is too wide to fit in the PVC pipe with the batteries installed and needs to be modified by removing the corner edges of the holder as shown below.
Tools Needed:
- Utility Knife
- Belt or disc sander
- Soldering iron & soldering materials
Materials needed:
- Battery Holder (Table 6 Item 29)
- JST wire connector (Table 6 Item 28)
- Additional wire (red, black)

-
- Remove the bottom edges of the battery holder (Figure 17)
- Remove 1/8” to 1/4” of the corner at an angle of 45 degrees to the sides of the holder
- Use a utility knife to clean up edges
- Using scissors or snips, remove the top 4 corners of the battery holder
- Install 3 D-cell batteries into the holder
- Note that different brands of batteries have slightly different sizes ▪ Duracell branded D-cells are slightly larger than EverReady branded cells
- We secured our D-cell batteries in the plastic holder with electrical tape ▪ This adds some slight thickness to the unit
- Test fit the holder with the batteries into a 1-1/2 in. PVC DWV Plain End Pipe section (Table 4 Item 1)
- Remove any additional edge via sanding, snips or utility knife as needed to fit
- If the fit is too tight, it is very hard to remove the battery pack without damaging the attached wires
- Remove the bottom edges of the battery holder (Figure 17)